March 31, 2011

... Pears with Blue Cheese and Prosciutto

Remember when I wrote about this and I told you that you'd be seeing several upcoming posts as a direct result of it?  Well, here we go!

- ripe, organic pears -

- fresh, crisp arugula - 

It just so happened that I had Wine Club this week and needed a great little appetizer to take.  I stumbled across this recipe and knew it'd be a hit.  When I received pears and arugula in my bitty box delivery, I knew it was the one.  It's kismet, no?


The crisp arugula gets laid over a juicy pear wedge, topped with creamy blue cheese and wrapped with a salty slice of prosciutto.  


It makes quite a bit... but doesn't last for long!


Pears with Blue Cheese and Prosciutto
serves 8

2 pears (such as Bosc or Bartlett), each cut into 8 wedges
2 teaspoons fresh lemon juice
1 cup arugula
3 ounces blue cheese, cut into small pieces
6 ounces thinly sliced prosciutto, cut in half lenthwise

In a large bowl, toss the pears and lemon juice.

Layer a slice of pear, an arugula leaf, and a piece of cheese on a piece of proscuitto and roll up.

Taylor's Notes:


That's about it... it's as simple as it sounds.  Quick to make, quick to disappear.


Enjoy!

March 29, 2011

... West Coast Grilled Vegetable Pizza

I have a confession to make.  Last night I went for cocktails with friends and ended up with this for dinner.


Yes, we went for happy hour on Monday.  Yes, that's oatmeal and blueberries.  Hey, technically it qualifies for Meatless Monday... but because I know that it's kind of a no-brainer, I thought I'd provide you with a much better meatless recipe that I made tonight.  Now introducing... my new favorite pizza.  


These fresh veggies are right up my alley and the goat cheese, well, don't get me started.  The crispness of the spinach and the creamy avocado are perfect with the tangy oil and vinegar dressing.  It's all just so very tasty and summery.  Maybe it'll be a favorite of yours, too.


West Coast Grilled Vegetable Pizza
serves 4

3 tablespoons olive oil
all-purpose flour, for shaping dough
1 pound store-bought pizza dough, fresh, or thawed if frozen
2 plum tomatoes, thinly sliced crosswise
2 scallions, white and green parts separated, thinly sliced
1 log (5 ounces) soft goat cheese, crumbled
coarse salt and ground pepper
1 bag (5 ounces) baby spinach
1 avocado, halved, pitted, peeled, and diced
2 tablespoons red-wine vinegar

Heat grill to medium.  Brush a large rimless baking sheet (or an inverted rimmed sheet) with 1 tablespoon oil.  On a lightly floured work surface, roll and stretch dough to two 8-inch ovals or rounds.  Transfer to prepared sheet.  Brush tops with 1 tablespoon oil.

Transfer dough to grill.  Cook, without turning over, until undersides are firm and being to char, 2 to 3 minutes.  Using tongs and a large spatula, place crusts on baking sheet, grilled side up.

Scatter crusts with tomatoes, scallion whites, and cheese; season with salt and pepper, and slide back onto grill.  Cook, rotating occasionally, until cooked through and cheese begins to melt, 3 to 5 minutes.  Transfer to a cutting board.

In a medium bowl, combine spinach, avocado, scallion greens, vinegar, and remaining tablespoon oil; season with salt and pepper, and toss to combine.  Pile mixture onto pizzas, halve, and serve.

Taylor's Notes:


I used refrigerated pizza dough which is absolutely easy and pretty darn tasty, actually.  Next time I'll make a stop at a local pizza shop and buy dough from them.  It'll make these pizzas that much better... plus they have whole wheat crust.


From start to finish, this recipe might have taken me 20 minutes.  How easy is that?  Perfect for a weeknight or a weekend when you've spent your entire day playing in the sun.  Oh Summer, please come soon! 


Also, I used my grill pan inside rather than my outdoor grill because, well, did I mention that it's not warm here yet?  Pizza on the grill is really delicious, though, so that'll be happening soon.  Very soon.  Isn't that right, Mother Nature?


Enjoy!

... Door to Door Organics

Have you heard of Door to Door Organics?  It's a local Kansas City company and I think I may be in love.  I heard about it a while ago when my awesome neighbors told me about it and I had every intention to join, but, in the end, it took a Groupon for me to pull the trigger.  And boy, am I glad I did. 


Soon I'll be enjoying fresh organic fruits and veggies every other week!  And I won't even have to go to the grocery store for them!  How exciting is that?!  Find one near you and you'll be over-using exclamation points just like me!  


This week I got arugula, green leaf lettuce, zucchini, bananas, an artichoke, pears, apples, and fingerling potatoes.  And you can bet they'll be showing up in posts very soon.  Come on, you know you're excited!

March 21, 2011

... Ravioli with Sweet Potatoes and Thyme

Ok, this is hands down one of the best recipes I've made lately.  Absolutely the best Meatless Monday recipe.  And what's even better... it's so easy.  Honestly, it had me at 'sweet potatoes and thyme' and then when I read 'goat cheese' I was sold.  The only thing that might make this any better may be toasted walnuts... or another serving.


The sweetness of the potatoes against the savory aroma of the thyme and the creaminess of the goat cheese... in the words of Carrie Bradshaw, Hello, lover.  


Ravioli with Sweet Potatoes and Thyme
serves 4

1 pound sweet potatoes, peeled and diced
2 tablespoons olive oil
1 tablespoon fresh thyme leaves
1/2 teaspoon kosher salt
1/4 teaspoon black pepper
16 to 18 ounces of fresh or frozen cheese ravioli
1/2 cup crumbled fresh goat cheese, plus more for serving

Heat oven to 425 degrees.

On a rimmed baking sheet, toss the potatoes, oil, thyme, salt and pepper.  Roast, tossing once, until the potatoes are tender, 20 to 25 minutes.

Meanwhile, cook the ravioli according to the package directions.  Reserve 1/3 cup of the pasta water, drain the ravioli, and return them to the pot.

Gently mix the ravioli with the goat cheese and the reserved pasta water; fold in the sweet potatoes and sprinkle with more goat cheese, if desired.

Taylor's Notes:


This is such a delicious, easy and filling recipe that I'll no doubt be making it over and over again.  Next time, I'll toast some walnuts or pine nuts to add a little crunch and another layer of flavor.  


I left the skin on the potatoes.  It saves a step in prep and you get all those great nutrients to boot!


I'm not sure if I've mentioned my lack of love for leftovers, but I can't wait to have this for lunch tomorrow... and that's definitely saying something!


Enjoy!

March 20, 2011

... Pea Pesto Crostini

Oh happy day!  A way to make fresh, delicious pesto anytime of year... even when basil isn't readily available.  And, even better, a great way to eat veggies.  Your mom will be so proud.


I'll admit, peas really aren't my favorite veggie.  I'll rarely, ok, almost never, fix them as a side or order them in a restaurant.  So when I noticed this recipe on one of my favorite blogs and realized it came from Giada (bonus!) then read all the rave reviews, I knew I needed to try it.  


And, as you probably know, nearly anything on top of warm, crusty bread is A-Ok in my book.


Now I can officially say I'm a fan of peas... when they're blended with garlic, cheese, and olive oil.  You tell me... who wouldn't want to take a bite out of this?


Pea Pesto Crostini


Pesto:
1 (10-ounce) package frozen peas, defrosted
1 garlic clove
1/2 cup grated Parmesan
1 teaspoon kosher salt, plus extra for seasoning
1/4 teaspoon freshly ground black pepper, plus extra for seasoning
1/3 cup olive oil

Crostini:
8 (1/2-inch thick) slices whole-grain baguette or ciabatta bread, preferably day-old*
1/3 cup olive oil
8 cherry tomatoes, halved or 1 small tomato, diced

For the pea pesto: Pulse together the peas, garlic, Parmesan, 1 teaspoon of salt and 1/4 teaspoon of pepper in a food processor.  With the machine running, slowly add the olive oil until well combined, about 1 to 2 minutes.  Season with additional salt and pepper, if needed.  Transfer to a small bowl and set aside.

For the crostini: Preheat a stove top griddle or grill pan on  medium-high heat.  Brush both sides of the sliced bread with olive oil and grill until golden, about 1 to 2 minutes.  Transfer the bread to a clean surface and spread 1 to 2 tablespoons of the prepared pesto on each slice.

Top with tomato halves and serve.

*If you don't have day-old bread on hand, you can dry out fresh bread by putting the slices in a preheated 300 degree oven until slightly crisp, about 5 minutes.

Taylor's Notes:


Instead of using day-old bread or drying it out as the recipe suggests and toasting them on a griddle, I sliced the fresh baguette into 1/4-inch thick pieces and placed them on a cookie sheet.  I drizzled them with olive oil and popped them into the oven for 5-10 minutes at 350 degrees... just until they were warm and toasty with a little bit of a crunch.


I also added a slice or two of shaved fresh Parmesan to the pea pesto before topping it with half of a grape tomato which gave it even more of that nutty cheese flavor... and gave me an excuse to use my very cool ceramic peeler that I got for Christmas from Dad.  Who, coincidentally, does love peas.


Enjoy!


March 16, 2011

... Chipotle Bean Burritos

I've really become quite a fan of Cooking Light magazine.  I'll admit, I was a little skeptical at first... who wouldn't be, but I have to say that some of my favorite recipes come from it.  And this is another to add to the list.


One big thing that I love about it is that I typically have most of the ingredients in my pantry.  Ok, so those black beans aren't organic, and yes, that's corn, not kidney beans... but what's also great is that you can improvise and still make great, healthy recipes that will most likely start appearing on your dinner table time and time again.


The recipes nearly always call for fresh veggies and herbs and great spices, but don't force you to shy away from not-so-great-for-you sour cream and cheese.  But really, who doesn't use light sour cream these days anyway?


Cooking Light is definitely a keeper in my book... er, magazine.

6 servings

1 tablespoon canola oil
1 garlic clove, minced
1/2 teaspoon chipotle chile powder
1/4 teaspoon salt
1/3 cup water
1 (15 ounce) can organic black beans, drained
1 (15 ounce) can organic kidney beans, drained
3 tablespoons refrigerated fresh salsa
6 (10-inch) reduced fat flour tortillas
1 cup (4 ounces) pre-shredded  reduced fat 4-cheese Mexican blend cheese
1 1/2 cups chopped plum tomato (about 3)
1 1/2 cups shredded romaine lettuce
6 tablespoons thinly sliced green onions
6 tablespoons light sour cream

Heat oil in a large nonstick skillet over medium heat.  Add garlic to pan; cook 1 minute, stirring frequently.  Stir in chile powder and salt; cook 30 seconds, stirring constantly.  Stir in 1/3 cup water and beans; bring to a boil.  Reduce heat and simmer 10 minutes.  Remove from heat; stir in salsa.  Partially mash bean mixture with a fork.

Warm tortillas according to package directions.  Spoon about 1/3 cup bean mixture into center of each tortilla.  Top each serving with about 2 1/2 tablespoons cheese, 1/4 cup tomato, 1/4 cup lettuce, 1 tablespoon onions, and 1 tablespoon sour cream; roll up.

Taylor's Notes:

As I mentioned, I didn't use organic black beans and didn't use the kidney beans at all.  It's not that I don't love kidney beans, I just didn't have them on hand.  I used Mexican Hot chile powder and love the kick it gave.   All in all a great Meatless Monday!

Enjoy! 


March 15, 2011

... Homemade Thin Mints

Have you ever met a person who doesn't love Girl Scout cookies?  I haven't!  What is it about them that makes you stock your freezer with all your favorites?  My all-time fave is Thin Mints.  Hands down.  No questions asked.  I love them so much that I didn't order even one box this year because I can't be trusted alone with them.   Seriously.  Not.one.box.  

So, it should come as no surprise that when I found a recipe (thankyouverymuch emily) to make my own, I couldn't resist.  Can you blame me? 


I know what you're thinking... 'Ok, Taylor, but are they just as good as the real thing?'  No, no they're not.  What?  Were you expecting they would be?  Come on now.  But are they good enough, even great enough, to do the trick in a what-on-earth-was-I-thinking-not-ordering-any craving?  Absolutely.


Homemade Thin Mint Cookies
makes 3 1/2 to 4 dozen cookies

2 1/4 cups all purpose flour
1/4 cup cornstarch
6 tablespoons unsweetened cocoa powder
1/2 teaspoon salt
1 cup white sugar
1/2 cup butter, room temperature
1/3 cup milk (any kind)
1/2 teaspoon vanilla extract
3/4 teaspoon peppermint extract

In a small bowl, whisk together flour, cornstarch, cocoa powder and salt.

In a large bowl, cream together butter and sugar.  With the mixer on low speed, add in the milk and the extracts.  Mixture will look curdled.  Gradually, add in the flour mixture until fully incorporated.

Shape dough into two logs, about 1 1/2 inches in diameter, wrap in plastic wrap and freeze for at least 1-2 hours, until dough is very firm.

Preheat oven to 375 degrees.

Slice dough into rounds not more than 1/4 inch thick - if they are too thick they will not be as crisp - and place on a parchment lined baking sheet.  Cookies will not spread very much so you can put them close together.

Bake for 13-15 minutes, until cookies are firm at the edges.  Cool cookies completely on a wire rack before dipping in chocolate.

Dark Chocolate Coating
10-ounces dark or semisweet chocolate
1/2 cup butter, room temperature

In a microwave-safe bowl, combine chocolate and butter.  Melt on high power in the microwave, stirring every 45-60 seconds, until chocolate is smooth.  Chocolate should have a consistency somewhere between chocolate syrup and fudge for a thin coating.

Dip each cookie in melted chocolate, turn with a fork to coat, then transfer to a piece of parchment paper or wax paper to set up for at least 30 minutes, or until chocolate is cool and firm.

Reheat chocolate as needed to keep it smooth and easy to dip into.

Taylor's Notes:
Although a little time consuming with having to freeze the dough for a couple hours and then dip each of the 48 plus or minus cookies, these are definitely a little gem I'll keep in my back pocket for special cravings... occasions.


Try to make the slices less than 1/4-inch thick if you can.  It's easier if the dough is really cold.  The end result of the cookie is much better if they're thinner.  


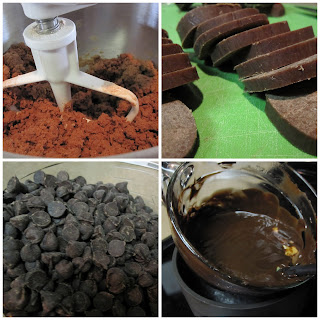
When it comes to making the chocolate coating, I would recommend melting the chocolate on the stove with a double-boiler rather than in the microwave.  This way, you won't run the risk of burning the chocolate and you won't have to keep re-heating it.  Put a little water into a small saucepan and bring it to a simmer.  Put your chocolate and butter into a glass bowl that will sit in the saucepan without touching the simmering water.  Stir your chocolate occasionally until it's melted to a dip-able consistency.  (Per the original recipe, that's somewhere between fudge and syrup... ummmm, I don't know about you, but that's a pretty big difference.)  I put a cookie on a fork and dipped it in the melted chocolate, then gently shook the fork so the excess chocolate comes off.  


The next part is very hard and if you're anything like me, you'll find yourself pacing the kitchen and hovering over the cookies waiting for the chocolate to harden so you can eat one... or four.


Enjoy! 

March 13, 2011

... Spinach Calzones with Blue Cheese

I haven't met a calzone that I didn't like... especially one that I've made.  And why would I?  They're so easy to personalize and add whatever you'd like that they're sure to be a hit with you whoever you share them with.


Spinach and mushrooms is no big shocker for me, but adding blue cheese in a calzone was a first (which actually is a shocker if you know how much I love blue cheese.)  There's a first time for everything.


These little pockets get baked to perfection in a hot oven so the pizza dough gets a great crunch on the outside but stays soft and chewy with each bite.  The ingredients are yours to choose, but I highly recommend spinach, mushrooms and, from now on, blue cheese.


Spinach Calzones with Blue Cheese
serves 4

1 (10 ounce) can refrigerated pizza crust
cooking spray
4 garlic cloves, minced
4 cups spinach leaves
8 slices Vidalia or other sweet onion
1 1/3 cups sliced cremini or button mushrooms
3/4 cup (3 ounces) crumbled blue cheese

Preheat oven to 425 degrees.

Unroll dough onto a baking sheet coated with cooking spray; cut into four quarters.  Pat each quarter into a 6x5-inch rectangle.  Sprinkle garlic evenly over rectangles.  Top each rectangle with 1 cup spinach, 2 onion slices, 1/3 cup mushrooms, and 3 tablespoons cheese.  Bring 2 opposite corners to center, pinching points to seal.  Bring remaining 2 corners to center; pinching all points together to seal.  Bake at 425 degrees for 12 minutes or until golden.

Taylor's Notes:


There are so many great fresh ingredients in these calzones that it's nearly impossible to keep those corners pinched together.  Do whatever it takes, though, because this presentation is much more interesting than the typical all-you-see-is-crust package.  


I drizzled olive oil and sprinkled just a little kosher salt over the top of each calzone before I popped them in the oven.  It's just that extra bit of flavor that's totally worth the 10 seconds of effort.


Enjoy!

... Southwestern Omelet

Breakfast for dinner is one of my favorite things.  Typically I go for something more sweet - it's like dinner and dessert wrapped into one! - but the black beans and cilantro in this recipe really caught my attention.


I also loved what a quick fix this was.  After a long day at work, sometimes it's nice to come home and not stand in the kitchen for an hour before you're ready to eat.


I hyped it up a bit with a few slices of fresh avocado and a dollop of sour cream for a truly Southwestern meal.


Southwestern Omelet
serves 2

2 tablespoons chopped fresh cilantro
1/4 teaspoon salt
4 large egg whites
1 large egg
1/2 cup canned black beans, rinsed and drained
1/4 cup chopped green onions
1/4 cup (1 ounce) reduced-fat shredded cheddar cheese
1/4 cup bottled salsa
cooking spray

Combine first 4 ingredients in a medium bowl, stirring with a whisk.  Combine beans, onions, cheese, and salsa in a medium bowl.

Heat a medium nonstick skillet coated with cooking spray over medium heat.  Pour egg mixture into pain; let egg mixture set slightly.  Tilt  pan and carefully lift edges of omelet with a spatula; allow uncooked portion to flow underneath cooked portion.  Cook 3 minutes; flip omelet.  Spoon bean mixture onto half of omelet.  Carefully loosen omelet with a spatula; fold in half.  Cook 1 minute or until cheese melts.  Slide omelet onto a plate; cut in half.

Taylor's Notes:


As I mentioned, this is a really quick and easy recipe.  I'm pretty sure I wouldn't have thought to put the cilantro in the eggs and what a great idea!  I halved the recipe and had more than enough of the bean mixture.  Not a problem for me, though!  I just ate it right alongside of the omelet.  One recommendation... heat the beans a little before mixing them with the onions and cheese.  They aren't in the skillet long enough to really warm up, so next time I'll definitely heat them prior to putting them with the eggs.


Enjoy!

March 7, 2011

... 4 Cheese Macaroni

I think I've mentioned my love for comfort food once or twice, no?  I thought so.  So it should come as no surprise to you that when I spotted this four cheese macaroni I knew I had to make it.  


The good news is it's really easy and relatively quick in the realm of homemade mac n' cheese.  The bad news is it's really easy and relatively quick in the realm of homemade mac n' cheese... you may find yourself making it a little too often (you know, if you like comfort food like I do).


3 cups pasta
2 cups heavy whipping cream
1/4 cup grated Mozzarella
1/4 cup grated Sharp Cheddar
1/4 cup grated Smoked Gouda
1/4 cup grated Pecorino
1 tablespoon cold butter
bread crumbs
cherry tomatoes
basil
salt and pepper

Cook your pasta until al dente in well salted water.  Shock (in cold water) and drain.  In a heavy sauce pot or cast iron pan, bring the cream to a slow rolling boil and reduce by half.  Mix in your cheeses, stirring constantly.  If you don't, you'll regret it, because you'll run the risk of scorching your pan, and having a burnt cheese coating that will take forever to scrape off.  Fold in your cooked pasta and cold butter until the cheeses have coated the noodles.  If the pasta is too thick, add more cream until you get your desired consistency.  Sprinkle bread crumbs over the top - just a light layer.  Broil on high until the crumbs have turned a golden brown.  Garnish with sliced cherry tomatoes and chiffonade basil.  

Taylor's Notes:

I had no doubt this would be a good recipe knowing where it came from.  The Four Foodies never disappoint and this was no exception.  The mac n' cheese was cheesy enough without being overly rich and the four selected cheeses worked really well together.  This will definitely be a recipe I keep on hand (much to my hips dismay)...

Enjoy!

March 4, 2011

... Marinated Tortellini and Vegetables

This salad always reminds me of backyard barbecues, weekends at the lake, and well, after today, fun group lunches at the office.  


It's so simple and easy with bright colors and great flavors, it's always a hit.  Give it a shot... I'll bet you'll be looking for a fun gathering to go to just so you can make it, too!


Marinated Tortellini and Vegetables

1 9-ounce package refrigerated cheese tortellini
1 14-ounce can artichoke hearts (not marinated), drained and quartered
8 ounces fresh, small mushrooms, rinsed and halved
1 pint cherry tomatoes, washed and cut in halves
1/2 cup whole black olives
1 cup Italian salad dressing (I like Ken's Italian Dressing with Aged Romano Cheese)


Cook tortellini according to package directions.  Rinse under cold water; drain.

Combine tortellini, artichokes, mushrooms, tomatoes and olives in a bowl.  Add salad dressing; toss gently to coat all ingredients.  Cover and chill one hour before serving.

Taylor's Notes:


Because I was making this for a group lunch at work, I prepped all the veggies in the evening and then cooked the tortellini and added it and half of the salad dressing the next morning.  I kept it all in the refrigerator until about twenty minutes before we were ready to eat to take the chill off.  I added the rest of the dressing then - just to freshen everything up.


Even with the half-and-half prep, it's a really quick and easy salad and is always a hit!


Enjoy!

March 2, 2011

... Smashed White Bean and Avocado Club

I stumbled across this recipe in my hunt for Meatless Monday gems.  It's a really quick and easy little number and was perfect for my I just got home from work and I'm starving! exclamation.  


For me, it's a perfect combo of creamy (beans and avocado), crunchy (cucumber and onion) and well, I'm not quite sure what the sprouts add, but I wouldn't think of leaving them out.  The bread is fresh from the bakery and I'll absolutely be enjoying it for the next few days as toast and, oh, maybe another Smashed White Bean and Avocado Club.


Smashed White Bean and Avocado Club
serves 4

2 15-ounce cans white beans, rinsed and drained
2 tablespoons extra-virgin olive oil
1/2 teaspoon kosher salt
1/4 teaspoon black pepper
12 slices multigrain bread
1 small red onion, thinly sliced
1 cucumber, preferably hothouse (seedless), thinly sliced (peeled, if desired)
1 4- to 5-ounce container sprouts (such as alfalfa, radish, broccoli, or a combo)
2 avocados, pitted and thinly sliced

In a medium bowl, combine the beans, oil, salt and pepper.  Roughly mash the mixture with the back of a fork.

Place 8 of the bread slices on a work surface.  Divide the mashed beans among them.  Top with the onion, cucumber, sprouts, and avocado.

Stack the open-faced sandwiches on top of one another, avocado-side up, to make 4 double-decker sandwiches.  Top with the remaining 4 slices of bread.

Slice each sandwich in half, if desired, and serve.

Taylor's Notes:
As hungry as I was, I didn't follow the whole make-a-mile-high-Dagwood-style-sandwich thing and instead went the traditional route.  It's a great sandwich and would be easy to adapt if you wanted to add other veggies, cheese, turkey... you know, if you like that sort of thing (and if it's not Monday).


Enjoy!