Showing posts with label breakfast. Show all posts

June 23, 2013

... Potato Frittata with Feta and Scallions

I realize I've been a little M.I.A. lately.  It's partially because I've just moved (if 7 months ago qualifies) and I've been busy with updating the house, getting settled, and waiting for my new dining room furniture to arrive.  Now that it has (hip hip hooray!!), I've been enjoying entertaining friends and family.  Today I got to host my dad, brother-in-law, nephew, and Grandma and Dale.  As breakfast / brunch is one of my most favorite meals, I'd say this might turn into a bit of a ritual.


Somewhat traditional breakfast ingredients - potatoes, eggs, bacon - are taken up a notch in a delicious frittata.  While the potatoes are roasting, take a few extra minutes to add Cinnamon Brown Butter Puffs and fresh fruit to the menu.


I don't mean to brag, but check out that frittata!  It was pretty darn tasty, but I'm convinced that what made it so good was the skillet.  I was lucky enough to get to use my Grandpa Jack's cast iron skillet (thanks for the loan, Dad!).  Whether you have a well-seasoned, well-loved skillet or a new one, I have no doubt your frittata will be a success, too.

Potato Frittata with Feta and Scallions
serves 6-8

3 tablespoons olive or vegetable oil
1 3/4 pounds Yukon Gold potatoes
1/2 teaspoon table salt, plus more for roasting potatoes
freshly ground black pepper
1/4 pound bacon, thick-cut, cut crosswise into 1/4" matchsticks
1/2 bunch (about 3 or 4) scallions, trimmed and thinly sliced
2/3 cup crumbled Feta cheese
6 large eggs
2 tablespoons milk or cream

Preheat oven to 400 degrees.  Coat a roasting pan or baking tray generously with oil, about 1 to 2 tablespoons.  Peel potatoes, and cut them into 1/4" - 1/2" slices, then halve them lengthwise into half-circle shapes.  Pile them in the prepared pan, and generously season with salt and freshly ground pepper.  Don't worry if they don't fall into one layer - the combo of some steamy / softer and some crisp-edged potatoes will work great in this dish.  Roast 30 minutes, or until potatoes are mostly cooked (they'll finish cooking with the eggs), tossing once halfway through.  Let cool slightly.

Cook bacon in well-seasoned 9" cast iron frying pan until crisp.  Scoop out with slotted spoon and drain on paper towels.  Add additional tablespoon oil to the bacon drippings in the pan, and reheat it over medium heat.  Swirl the oil and drippings around in the pan and up the sides, being sure to coat it fully.

Arrange roasted potatoes in your skillet.  If there are pieces with browned undersides, flip the toasty sides up.  Scatter bacon, then scallions and feta over potatoes.  Whisk eggs with milk, 1/2 teaspoon salt, and several grinds of black pepper in a medium bowl, and pour over potatoes.  Cover skillet with foil and bake 20 minutes.  Remove foil, and bake another 10 to 15 minutes or until puffed at the edges and set in center.

Serve right from the skillet in 6 to 8 wedges.

Taylor's Notes:
This is another winner from Smitten Kitchen.  It doesn't look like Deb has posted it on her website, but it's in her cookbook.  Buy it if you haven't already - you won't regret it.

I used small gold potatoes rather than the Yukon Gold, solely because my grocery store only offered a 5-pound bag of Yukon Golds and one girl just doesn't need that many potatoes.  I reduced the roasting time of the potatoes by 5 minutes, but other than that I followed the recipe.  And really, when it comes to recipes that come out of the Smitten Kitchen, that's exactly what you should do.

Enjoy!

September 17, 2012

... a Baby Shower!

My sister is having a baby... there's no better reason to celebrate!  Two of our best friends siiisters and I hosted a shower for her and it couldn't have been more fun!  Thanks to Pinterest (I know, it's kind of an obsession), we found great baby (sized) brunch foods, a fun idea for a Mimosa Bar (hey, who says you can't toast the mother-to-be?), and some cute decorating ideas.

{clockwise from top alongside decorations: chocolate dipped strawberries, sweet elephant sugar cookies, silverdollar pancake stacks, mini cinnamon rolls, a make-your-own mimosa bar, 
grandma norma's fruit cups}

It was a great time with fun family and friends and Baby E was certainly spoiled!  We're all so excited for him to arrive!

Chocolate Dipped Strawberries are a piece of cake.  Be sure to wash your strawberries and let them dry completely before dipping them into melted chocolate almond bark.  We sprinkled ours with brightly colored nonpareils.  Set the dipped and decorated strawberries on wax paper to cool and set.

Connie's Cookies makes delicious and adorable decorated sugar cookies.  We've been a fan since we were kids, so it only made sense that we share the love with super cute elephants as a small gift for the guests.

Who wouldn't love a miniature stack of pancakes?  Skewer your favorite recipe with a couple of blueberries, drizzle with real maple syrup, and just try to not eat your weight in stacks.

Know what's better than a cinnamon roll?  Miniature cinnamon rolls that are just a little to easy to pop in your mouth.  Click here for a simple recipe that's sure to be a hit.

My sister may disagree, but I'd say that one of the most fun things at the shower was the make-your-own mimosa bar.  It was one-stop shopping for us where this was concerned and the stop of choice was Trader Joe's.  Fresh fruit - we chose strawberries, blueberries, and raspberries - fruit juice - peach, cranberry, blackberry - and Prosecco.  What combinations can you come up with?

And, in case that's just not enough, we also served Frozen Fruit Cups.  Grandma Norma always had these at the ready for me and Kate anytime we'd visit her.  They're perfect for kids and adults the same and, with a quick zap in the microwave, make for a perfect breakfast-on-the-go.  There's just something that makes your day go better when you start it off with sweet memories.

1 large (12 ounce) can frozen orange juice, thawed
2 cups sugar (absolutely optional - and is actually better without... at least as an adult)
1 large can apricots, chopped and drained
1 large can crushed pineapple, drained
2 tablespoons lemon juice
1 cup water
6 bananas, chopped

Mix all ingredients and freeze in muffin cups, wine-sized small Solo cups, or, for a special occasion, darling pedestal cups.

Enjoy!

As I mentioned above, the four of us are more than friends - we're siiisters.  Can't you see the resemblance?

{Lindsay, Taylor, Ashley, Kate}

And two of the four of us are pregnant (or were at the time of the actual shower!)  We got to welcome Ashley's baby, Bennett, to the family this weekend.  He joins his two brothers, Quinn and Owen.  Once Baby E arrives, he'll join his brother, Mason, and we'll have five - FIVE! - nephews... and we couldn't be happier!


How cute are they?!?  Love my siiisters!

May 14, 2012

... Open-Faced Sandwiches with Ricotta, Arugula, and Fried Egg

What comes to mind when I say "BFD!"?  If you're thinking "Breakfast For Dinner!", gold star for you.  If you're thinking something else, well... double gold star.  Because, in my book, breakfast for dinner is a BFD.


Creamy ricotta with crisp arugula and a fried egg?  How could you go wrong?  


serves 4

4 (2-ounce) slices whole-wheat country bread
cooking spray
2 cups arugula
1 tablespoon extra-virgin olive oil, divided
1 1/2 teaspoons fresh lemon juice
1/2 teaspoon salt, divided
1/2 teaspoon freshly ground black pepper, divided
4 large eggs
3/4 cup part-skim ricotta cheese
1/4 cup (1 ounce) grated fresh Parmigiano-Reggiano cheese
1 teaspoon chopped fresh thyme

Preheat broiler.

Coat both sides of bread with cooking spray.  Broil 2 minutes on each side or until lightly toasted.  

Combine arugula, 2 teaspoons oil, juice, 1/8 teaspoon salt, and 1/4 teaspoon pepper; toss gently.

Heat remaining 1 teaspoon oil in a large nonstick skillet over medium heat.  Crack eggs into pan; cook 2 minutes.  Cover and cook an additional 2 minutes or until whites are set.  Remove from heat.

Combine 1/4 teaspoon salt, ricotta, Parmigiano-Reggiano, and thyme; spread over bread slices.  Divide salad and eggs evenly over bread.  Sprinkle with remaining 1/8 teaspoon salt and remaining 1/4 teaspoon pepper.

Taylor's Notes:
Delish!  This is great for dinner, but I'm sure would be just as tasty for breakfast or lunch... somehow, though, BFB and BFL don't have quite the ring that BFD does.  Amiright?  

I left out the lemon juice and thyme because I didn't feel like running to the store (lazy much?) and it still disappeared quickly.  

Enjoy!

May 8, 2012

... Insanely Good Blueberry Oatmeal Muffins

I think I've made it pretty clear how much I love baked goods and my feelings certainly don't falter when it comes to blueberry muffins.  Especially if they're dubbed 'insanely good'.  I mean, who could resist that proclamation?  


When you pair that with something that's good for you... or at the very least not bad for you... (thankyouverymuch Skinny Taste!) you've got one great recipe and one insanely good breakfast treat.


Insanely Good Blueberry Oatmeal Muffins
makes 12

1 1/2 cups Quaker quick oatmeal
1 cup unsweetened almond milk (or skim milk)
1/2 cup brown sugar, packed
2 tablespoons agave (or sugar, honey)
1/2 cup unsweetened applesauce
2 egg whites
1 tablespoon oil
1 teaspoon vanilla extract
1/2 cup whole wheat flour
1 teaspoon baking powder
1/2 teaspoon baking soda
1/2 teaspoon salt
1 cup fresh blueberries
baking spray

Preheat oven to 400 degrees.  Line a muffin tin with liners and lightly spray with oil.

Place oats in a food processor or chopper and pulse a few times.  Soak oats in milk for about 30 minutes.

In a medium bowl combine brown sugar, agave, applesauce, vanilla, egg whites, oil, and mix well.

In a third bowl combine whole wheat flour, salt, baking powder, baking soda, and whisk to combine.

Combine oats and milk with sugar, applesauce mixture and mix well.  Slowly add in the dry ingredients and mix until just incorporated.  Fold in blueberries.

Spoon into the muffin tin and bake for 22-24 minutes.

Taylor's Notes:
I have a sinking suspicion these will become a staple at my house.  Won't you join me?

Enjoy!

January 1, 2012

... Cinnamon Brown Butter Breakfast Puffs

Happy New Year (part two)!  I made these delicious little bites of heaven alongside the Spinach and Cheese Strata for brunch this morning.  By the way, Cheers!


If you have yet to travel into the beautiful world of brown butter, I highly suggest you make this recipe the first stamp in your passport.


Do it soon though, or it'll quickly ruin your 2012 diet plan. 


Cinnamon Brown Butter Breakfast Puffs
makes 30-34 mini puffs

Coating
2/3 cups granulated sugar
1 tablespoon ground cinnamon
6 tablespoons unsalted butter

Puffs
1 1/2 cups all-purpose flour
1 1/2 teaspoons baking powder
1/2 teaspoon baking soda
1/2 teaspoon table salt
1/4 teaspoon freshly grated nutmeg
1/2 cup granulated sugar
1/3 cup (5 tablespoons plus 1 teaspoon) unsalted butter, at room temperature, plus extra for greasing muffin cups
1 large egg
1 teaspoon pure vanilla extract
1/2 cup buttermilk

Preheat oven to 350 degrees.  Butter 12 standard size or 30 miniature muffin cups, or line cups with paper liners.

Prepare coatings: In a small saucepan, melt 6 tablespoons butter over medium heat and continue to cook it, stirring frequently, until brown bits form on the bottom and it smells nutty and heavenly.  Immediately remove from heat and set aside.  In a small bowl, combine 2/3 cup sugar and cinnamon.  Set aside as well.

Prepare puffs: Whisk flour, baking powder, baking soda, salt and nutmeg together in a medium bowl and set aside.  In the large bowl of an electric mixer, beat softened butter and sugar together until light and fluffy.  Add egg and vanilla and beat until combined.  Mix in 1/3 of flour mixture, followed by 1/2 of buttermilk, repeating again and finishing with the flour mixture.  Mix only until combined.

Spoon into prepared muffin cups, filling only 3/4 of the way.  Bake standard sized muffins for 20 to 25 minutes and miniature muffins 12 to 14 minutes.  When finished, muffins will feel springy to the touch and  a tester inserted into the center will come out clean.  Transfer them in their pan to a wire rack.

As soon as you fell you're able to pick one up, take your first puff and roll the top and upper edges in the browned butter.  Don't be afraid to pick up the browned butter solids at the bottom of the saucepan; they're the dreamiest part.  Let any excess butter drip off for a second before gently rolling the butter-soaked cake top in cinnamon-sugar.  If you roll too firmly, or have too much wet/not absorbed butter on top, the sugar can clump off, which is heartbreaking.  Transfer puff to wire rack to set and repeat with remaining puffs.  Eat warm.

For an even more indulgent, doughnut-like puff: Make an extra two tablespoons of the browned butter and roll the whole puff in it and the cinnamon sugar.

Do ahead: Puffs are best within hours after they are baked.  They can be made in advance and stored in a freezer bag until needed, too.  Simply spread them out on a baking tray and reheat them until warm in the oven.

Taylor's Notes:
Seriously.  Heaven.  Since it's New Years Day, I figured I should definitely follow Deb's note for a 'more indulgent' puff and made the extra butter.  I'm not sure why you wouldn't always do this (hello... it's browned butter, people), but I'm sure it does help with those few extra calories.  I did have more than enough sugar-cinnamon, but ran short on the butter, even with the extra two tablespoons.  Other than that, the recipe was easy, delicious, and will most certainly be making a repeat appearance.


Enjoy and Happy New Year!

... Spinach and Cheese Strata

Happy New Year!  I hope yours is off to a tremendous start!  I kicked mine off with having my family over for brunch.  What better way to begin 2012 than with good food and family?  


I'm excited to report that my first strata was a success!  Hooray!  I must admit I caught myself channeling Sarah Jessica Parker in The Family Stone while I was baking.  Thank goodness mine didn't end up the way hers did!


Spinach and Cheese Strata
serves 8-10

1 (10 ounce) package frozen spinach, thawed, squeezed of all excess liquid, and chopped
1 1/2 cups finely chopped onion (1 large)
3 tablespoons unsalted butter
1 teaspoon salt
1/2 teaspoon black pepper
1/4 teaspoon freshly grated nutmeg
8 cups cubed French or Italian bread in 1-inch cubes (1/2 pound)
6 ounces coarsely grated Gruyere (2 cups)
2 ounces finely grated Parmesan (1 cup)
2 3/4 cups milk
9 large eggs
2 tablespoons Dijon mustard

Saute onion in butter in a large, heavy skillets over medium heat until soft, about 5 minutes.  Add 1/2 teaspoon salt, 1/4 teaspoon pepper, and nutmeg and continue cooking for one minute.  Stir in spinach, remove from heat and set aside.

Spread one-third of the bread cubes in a well-buttered 3-quart gratin dish or other ceramic baking dish.  Top with one-third of spinach  mixture and one-third of each cheese.  Repeat, layering twice, with remaining bread, spinach, and cheese.

Whisk eggs, milk, mustard, and remaining 1/2 teaspoon salt and 1/4 teaspoon pepper together in a large bowl and pour evenly over strata.  Cover with plastic wrap and chill strata for at least 8 hours or up to a day.

The next day, let it stand at room temperature for 30 minutes while preheating the oven to 350 degrees.  Bake strata, uncovered, in middle of oven until puffed, golden brown, and cooked through, 45-55 minutes.  Let stand 5 minutes before serving.

Taylor's Notes:
Another easy and delicious recipe from Smitten Kitchen.  I followed the directions to a tee except that my baking dish allowed for only two layers instead of three.  I don't think it made a bit of difference - so work with what you've got.  I baked it for 50 minutes and let it set for about 10 while I was finishing up the rest of breakfast.  It was really great and I'll definitely make it again... love recipes that you can mix up the night before (like this one) and bake the next morning!


Enjoy and Happy New Year!

April 3, 2011

... Blueberry Oatmeal Muffins

Blueberries, oatmeal, and muffins.  Three foods I love separately, but even more together.  These were really easy to make and, although the recipe indicates they're for 12- to 18-month olds (something I'm still trying to figure out), I think they're perfect for breakfast or a snack... whatever your age!


As soon as I finished making the batter, I realized I only had snowman muffin liners.  Considering I'm so completely over winter, I couldn't bring myself to use them.  I've always seen muffins wrapped in pretty folded parchment paper, so after a quick Google search for 'parchment muffin cups', I found this tutorial and decided to give it a shot.


It really was pretty easy (considering I only had 16 to make) and I think the end result is much better than a snowman liner any old day, but especially in April.


Blueberry Oatmeal Muffins
makes 16 muffins

1 2/3 cups quick-cooking oats
3 ounces all-purpose flour (about 2/3 cup)
2.33 ounces whole-wheat flour (about 1/2 cup)
3/4 cup packed light brown sugar
2 teaspoons ground cinnamon
1 teaspoon baking powder
1 teaspoon baking soda
3/4 teaspoon salt
1 1/2 cups low-fat buttermilk
1/4 cup canola oil
2 teaspoons grated lemon rind
2 large eggs
2 cups fresh or frozen blueberries
2 tablespoons all-purpose flour (only needed if using frozen blueberries; omit if using fresh)
cooking spray
2 tablespoons granulated sugar

Preheat oven to 400 degrees.

Place oats in a food processor; pulse 5 to 6 times or until oats resemble coarse meal.  Place in a large bowl.

Weigh or lightly spoon flours into dry measuring cups; level with a knife.  Add flours and next 5 ingredients (through salt) to oats; stir well.  Make a well in center of mixture.

Combine buttermilk and next 3 ingredients (through eggs).  Add to flour mixture; stir until just moist.

Toss berries with 2 tablespoons flour, and gently fold into batter.  Spoon batter into 16 muffin cups coated with cooking spray; sprinkle 2 tablespoons granulated sugar evenly over batter.  Bake at 400 degrees for 20 minutes or until muffins spring back when touched lightly in center.  Remove from pans immediately; place on a wire rack.

Taylor's Notes:


I know that with baking you're supposed to be very exact in your measurements, hence the actual weights of flour.  I haven't ever gotten into it that deeply, but I do make sure that my measurements are right on and I've never had any problems.  But, there they are just in case...


If you should choose to take on the parchment muffin liner challenge, here are a few tips I learned.  Spray the muffin tins lightly with non-stick spray.  Ironically, this will help the parchment stick.  It's not perfect, but it does help.  The downside is that the outside of your liners are then a little greasy when you take the baked muffins of the pan.  Be sure to make your folds flat so that the batter doesn't seep between the paper.  And finally, I used a scoop to put the batter into the cups.  Using one hand to hold the paper liner in place and the other to scoop the batter into the cup.  Two scoops per cup was the perfect amount.


These muffins came out very moist and the fresh blueberries are so delicious.  I think I'll attempt to freeze a few because, although they're not too bad for you, I don't think I should polish off 6 or 8 muffins before they go bad.  Swimsuit is just around the corner, you know.


Enjoy!


March 13, 2011

... Southwestern Omelet

Breakfast for dinner is one of my favorite things.  Typically I go for something more sweet - it's like dinner and dessert wrapped into one! - but the black beans and cilantro in this recipe really caught my attention.


I also loved what a quick fix this was.  After a long day at work, sometimes it's nice to come home and not stand in the kitchen for an hour before you're ready to eat.


I hyped it up a bit with a few slices of fresh avocado and a dollop of sour cream for a truly Southwestern meal.


Southwestern Omelet
serves 2

2 tablespoons chopped fresh cilantro
1/4 teaspoon salt
4 large egg whites
1 large egg
1/2 cup canned black beans, rinsed and drained
1/4 cup chopped green onions
1/4 cup (1 ounce) reduced-fat shredded cheddar cheese
1/4 cup bottled salsa
cooking spray

Combine first 4 ingredients in a medium bowl, stirring with a whisk.  Combine beans, onions, cheese, and salsa in a medium bowl.

Heat a medium nonstick skillet coated with cooking spray over medium heat.  Pour egg mixture into pain; let egg mixture set slightly.  Tilt  pan and carefully lift edges of omelet with a spatula; allow uncooked portion to flow underneath cooked portion.  Cook 3 minutes; flip omelet.  Spoon bean mixture onto half of omelet.  Carefully loosen omelet with a spatula; fold in half.  Cook 1 minute or until cheese melts.  Slide omelet onto a plate; cut in half.

Taylor's Notes:


As I mentioned, this is a really quick and easy recipe.  I'm pretty sure I wouldn't have thought to put the cilantro in the eggs and what a great idea!  I halved the recipe and had more than enough of the bean mixture.  Not a problem for me, though!  I just ate it right alongside of the omelet.  One recommendation... heat the beans a little before mixing them with the onions and cheese.  They aren't in the skillet long enough to really warm up, so next time I'll definitely heat them prior to putting them with the eggs.


Enjoy!

October 29, 2010

... Pepita Granola

Have I mentioned my love for granola?  I've bought it more often than I've made it, but when I made it here and it was really tasty... and easy... and probably so much better for me than the store-bought stuff. 


When I came across this recipe on one of my go-to blogs, I couldn't wait to make it.  It seemed so Fall-ish with its pumpkin seeds, nuts and spices... it was just what I was looking for.


And when it's paired with pumpkin butter and plain yogurt, it's perfection on a crisp Fall morning.


Pepita Granola


3 cups old-fashioned rolled oats
1 cup sweetened flaked coconut
1/4 cup vegetable oil
1/2 cup sliced almonds
1/2 cup chopped walnuts
1/3 cup green (hulled) pumpkin seeds, sometimes called pepitas (not roasted)
1/3 cup packed dark brown sugar
1/4 cup mild honey
pinch cinnamon
pinch salt

1 cup tart dried cherries
1/2 cup dried blueberries
1/2 cup dried pears (1/4 inch dice)
1/2 cup diced dried apricots (1/4 inch dice)
1/3 cup golden raisins

OR

2 3/4 cup mixed dried fruit of your choice

Accompaniment: plain yogurt flavored with vanilla extract, pumpkin butter, or apple butter.

Put oven rack in middle position and preheat oven to 375 degrees.  Stir together all ingredients except the fruit in a large bowl until combined.  Spread mixture evenly on a large (17x12) shallow baking pan lined with parchment paper and bake, stirring occasionally, until golden brown, 30 to 35 minutes, but checking every five minutes after the 15-minute mark because it burns quickly.  Transfer granola, in pan, to rack to cool stirring occasionally, about 45 minutes.

Stir in dried fruit.

Granola keeps frozen (the fruit's moisture softens granola if not kept frozen) in an airtight container, for a few months.

Taylor's Notes:


Ok, she's really not kidding about how quickly granola can burn.  I baked mine just like she said, for 15 minutes, stir, and then check every 5 minutes.  I took it out after 20 minutes... total.  And when I do it over again, I'll probably take it out at 17 1/2 minutes.  It burns quickest at the edges, so be sure to pay close attention to those areas when stirring.


As far as fruit, I used 1 cup of dried figs, halved, 1 cup of dried sweetened blueberries, and 3/4 cup of dried tart cherries.  I'm still on the hunt for dried pears... yum.


Enjoy!

October 24, 2010

... Pumpkin Butter

Who else is glad the 'Great Pumpkin Shortage of 2009' is a thing of the past?  This girl is, that's who.  And when I found this recipe I knew it for sure.


I don't know what flavor screams "fall!" more than pumpkin.  Add to that brown sugar, and spices like cinnamon, nutmeg, and cloves and you have the makings for one sweet treat.


And why not share the love?  Pack that pumpkin in some cute little jars to give to friends and you'll soon realize you just might need to make another batch... for yourself!


Pumpkin Butter


1 (29 ounce) can pumpkin puree
3/4 cup apple juice
2 teaspoons ground ginger
1/2 teaspoon ground cloves
1 1/3 cups brown sugar
1 tablespoon ground cinnamon
1/2 teaspoon ground nutmeg

Juice of half a lemon (or 3 tablespoons lemon juice)

Combine pumpkin, apple juice, spices, and sugar in a large saucepan; stir well.  Bring mixture to a boil.  Reduce heat, and simmer for 30 minutes or until thickened.  Stir frequently.  Adjust spices to taste.  Stir in lemon juice, or more to taste.

Once cool, pumpkin butter can be kept in an airtight container in the refrigerator.

To preserve: Spoon hot pumpkin mixture into hot jars, filling to within 1/4 inch from top.  Remove air bubbles; wipe jar rims.  Cover at once with metal lids, and screw on bands.  Process in a boiling water bath for 10 minutes.

Taylor's Notes:
After I realized just how quickly I was going through that 'cute little jar' I decided to make another batch.  I'm not quite sure how, but the two batches were totally different.  The first was runny and took forever to thicken up (splattering and making a huge mess in the process) and the second was perfectly thick from the get go.  What I know to be true is that I definitely forgot the lemon juice in the second batch and I may or may not have only added a teaspoon of cinnamon to the first batch.  Don't ask me how... I must have been overcome with the amazing aroma that I wasn't concentrating on the recipe.  But, what I also know to be true is that both the batches taste really great.


I wasn't quite sure how preserving would work, so I called Grandma and got some great advice, as usual.  Follow the recipe to preserve as written above, but instead of processing the jars in a water bath, flip the jars over and let them sit until the metal lid has popped.  If you push down on the lid and it pops back, flip those jars back over and let them sit a while longer.  Just to be safe, I'd recommend keeping the pumpkin butter in the refrigerator, but to be honest it probably won't be around long enough for it to go bad. 


I was able to fill four 8-ounce jars with one batch of the mixture... which made for six lucky friends and just enough left for me.


Enjoy!


September 9, 2010

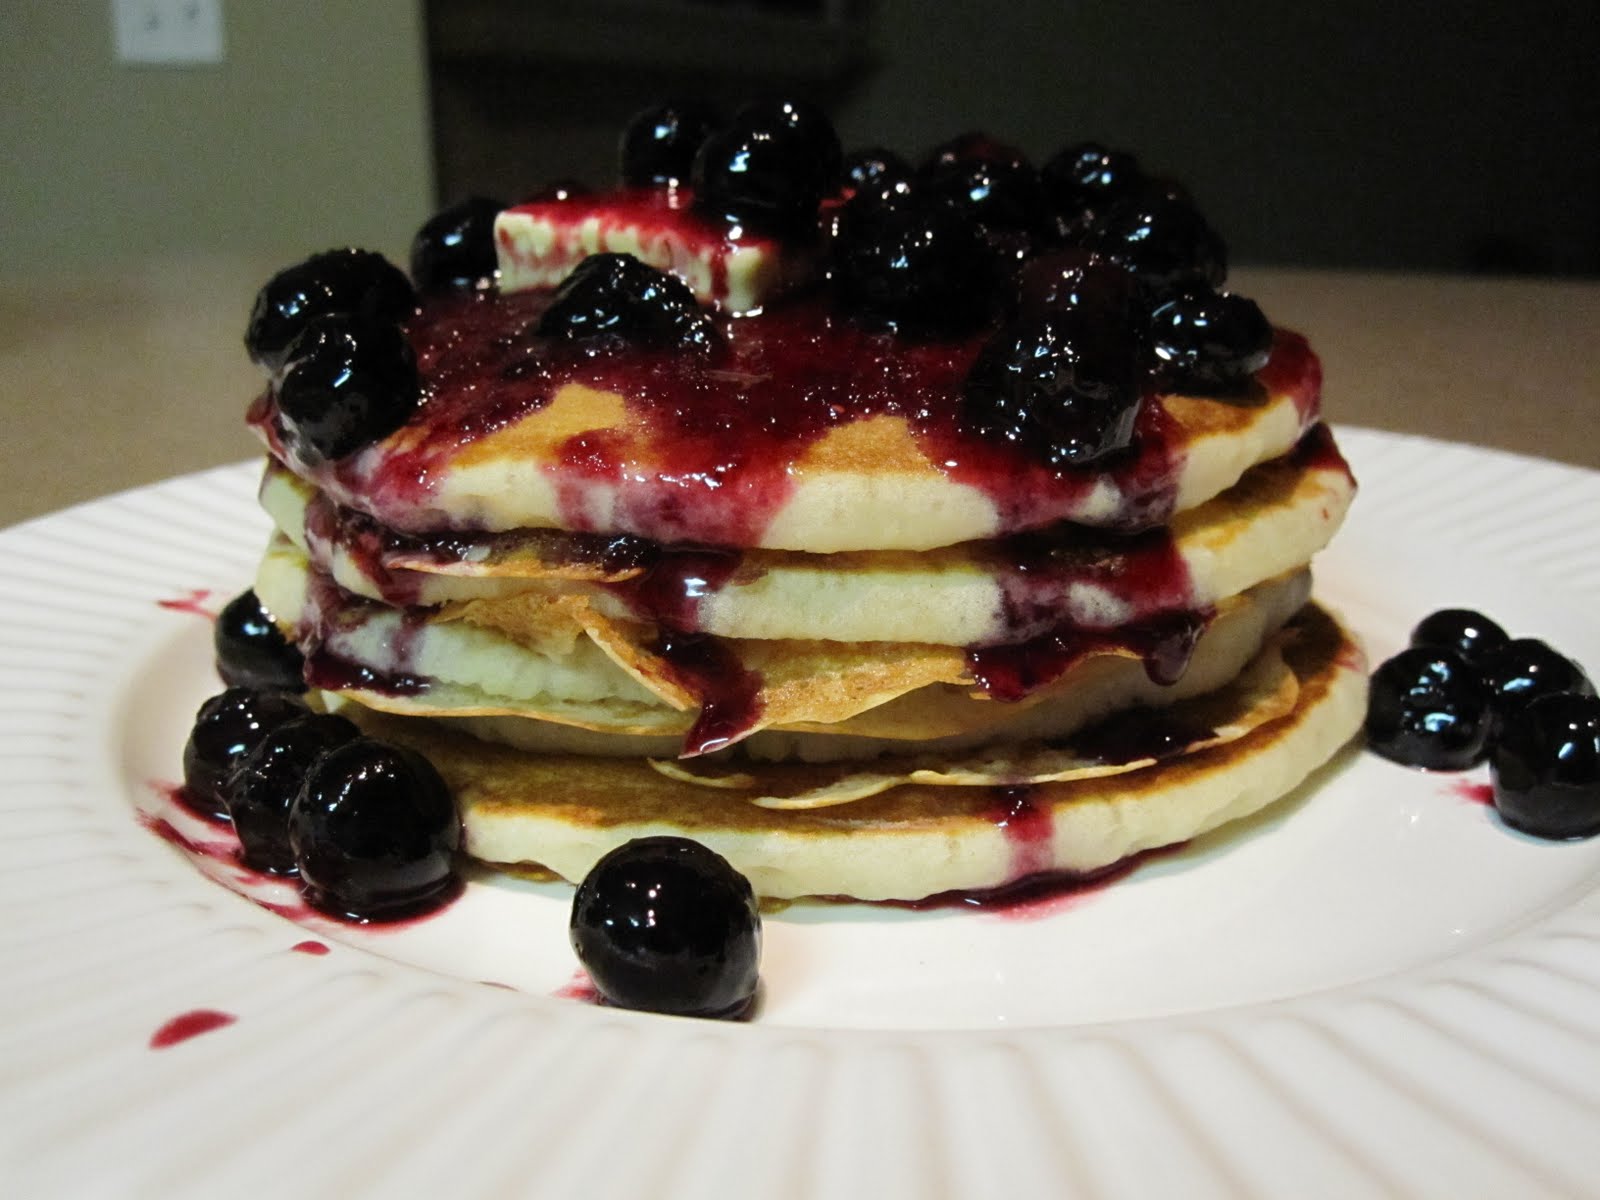
...Pancakes with Blueberry Sauce

Ok, whoever came up with the idea of breakfast for dinner is brilliant.  I mean, the kind of brilliant that deserves a medal.  Or a hug, a big, big hug.

Today was a dreary, drizzly, kind of cool, almost Fall kind of day... the perfect kind of day for comfort food.  And so it became clear, on my drive home, that I should make pancakes.  And I should make them with a wonderfully decadent blueberry sauce.  And so I did.


And it was the best decision I'd made all day.  Even the dogs agree!


Now, there's really not much to making pancakes and I would assume that most people have their favorite recipe.  So, I'm not going to tell you how I used Aunt Jemima mix, added and egg, some milk, and a little oil and had the best pancakes I've ever made.  But what I can do is give you a few tips and tricks to help you get great pancakes on your plate every time.  
  1. If you can get my dad to make them for you, do it.  He's the best pancake maker ever.  Seriously.
  2. If you can't, follow these simple rules...
    1. Make sure your pan is hot enough.  Heat it over medium to medium-high heat.  Not too hot or your pancakes will be crisp on the outside and gooey in the middle.  Yuck.  A good trick is to sprinkle water on the pan.  When the water bubbles up and sizzles away, your pan is hot enough.
    2. Don't crowd your pancakes.  Depending on the size of your pan, only pour the batter for two or three at a time.  
    3. Let them be!  Your batter will bubble up and you'll be able to see the edges start to form.  Only then should you flip them.  And when you do, they'll be a beautiful golden brown.


Now don't get me wrong, I love a good pancake with butter and syrup just like the next girl, but sometimes you just want a little something extra.  Take a look at this and tell me if that's not a little something extra...


1/2 cup sugar
3 tablespoons unsalted butter
2 cups berries or other ripe fruit - apples, pears, bananas, peaches, etc...

Combine 1/2 cup water with the sugar and butter in a heavy-bottomed medium saucepan over medium-high heat and cook, shaking and stirring, until the mixture is thick and syrupy but not browned.

Toss in the fruit and cook over low heat until the fruit begins to break up and release its juices, about 2 minutes for berries, longer for other fruit.  Press fruit through a fine-mesh strainer or run it through a food mill to puree and remove any skins or seeds.  Serve warm or at room temperature.  This sauce keeps well, refrigerated, for up to a week.

Taylor's Notes:

I had no doubt that I'd find the recipe I needed in my How to Cook Everything cookbook.  That book should seriously be in everyone's cookbook collection.

I followed the recipe exactly (with the exception of halving it) and it came out perfectly.  Oh, I also didn't press the fruit through a strainer or puree it as I wanted some whole fruit on my pancakes.  But other than that, I followed the other steps to a tee.  

Getting the butter / sugar / water mixture to thicken took about 5 minutes after the butter melted.  As you can see in the pictures above, it'll all melt, then foam, and then thicken.  I added the blueberries and tossed them around for about two minutes and then took the pan off the heat and let it set until my pancakes were done.  

It was easy and then end result had me wishing I hadn't fed the rest of the pancakes to the dogs. 

Enjoy!


September 7, 2010

... Peach Shortbread

Bars are never something that I think about too much when I'm in the mood to bake.  I'm not sure why... there are so many varieties and they're usually pretty easy to make (and the fact that I just posted on Lemon Bars kind of makes this whole paragraph a lie... but we won't go there).  Regardless, when I came across this recipe I knew it was definitely one I wanted to try.


Peaches, shortbread, brown butter... love, yum, ok!  I've never had anything bad from her site so I had no doubt this time would be any different.


And I was right.  These were easy as... well, I would say pie... but these are way easier than pie.


Peach Shortbread


1 cup white sugar
1 teaspoon baking powder
2 3/4 cups plus 2 tablespoons all-purpose flour
1/4 teaspoon cinnamon
1/8 teaspoon grated nutmeg
1/4 teaspoon salt
1 cup cold unsalted butter
1 large egg
2 peaches, pitted and thinly sliced (between 1/8- and 1/4-inch thick)

Brown your butter:  Melt butter in a small/medium saucepan over medium-low heat.  It will melt, then foam, then turn clear golden and finally start to turn brown and smell nutty.  Stir frequently, scraping up any bits from the bottom as you do.  Keep your eyes on it; it burns very quickly after it browns and will the very second that you turn around to do something else.  Set it in the freezer until solid (about 30 minutes).


Preheat oven to 375 degrees.  Butter a 9x13 inch pan, or spray it with a nonstick spray.  In a medium bowl, stir together sugar, baking powder, flour, salt, and spices with a whisk.  Using a pastry blender, fork, or your fingertips, blend the solidified brown butter and egg into the flour mixture.  It will be crumbly.  Pat 3/4 of the crumbs into the bottom of the prepared pan, pressing firmly.  Tile peach slices over crumb base in a single layer. Scatter remaining crumbs evenly over peaches and bake in preheated oven for 30 minutes, until top is slightly brown and you can see a little color around the edges.  Cool completely in pan before cutting into squares.

Taylor's Notes:
I'm still getting the hang of browning butter, so I keep trying knowing what an incredible difference it makes.  It's certainly something that takes some practice and patience to get it brown, but not burn it.  You can make this recipe with softened butter instead and it will be good, but man, what a difference brown butter can make.


I definitely think the best way to blend the flour mixture with the butter and egg is to start with a fork and then use your fingertips.  It's messy, yes, but isn't that the fun of baking??  


Enjoy!  

March 3, 2010

... Overnight Coffee Cake

One of my most favorite things to do is bake.  Cookies, cakes, cupcakes, pies, coffee cakes, you name it, I love it.  It's comfort food and it makes people happy.  This is definitely one of my go-to recipes and now it's in the Kansas City Star!  One of my good friends, Steph, submitted my name to the Come Into My Kitchen feature writer and look at me!, I'm a star!... or at least in the Star.  


Look how fluffy that cake is!  You can see the flecks of cinnamon and nutmeg and, as a special bonus, it makes your kitchen smell amazing.


serves 12-16

1 cup sugar
1/2 cup brown sugar
2/3 cup oleo

Cream together and add 2 eggs

1 cup buttermilk
2 cups flour
1 teaspoon baking soda
1/2 teaspoon salt
1 teaspoon baking powder
1 teaspoon cinnamon

Add dry ingredients alternately with buttermilk.  Beat well.  Spread in a greased 9 x 13 pan.  Sprinkle with topping (see below).  Refrigerate overnight.  Bake at 350 degrees for 30-40 minutes.

Topping:
1/2 cup brown sugar
1/2 teaspoon cinnamon
1/2 cup pecans, chopped
1/4 teaspoon nutmeg

Taylor's Notes:
There's really nothing to note about this recipe except that I got it from my mom who has had it for 20+ years who got it from one of her good friends who has had it for 35+ years... it's pretty much tried and true.  What more can you ask for?

Enjoy!

March 1, 2010

... Granola + Yogurt Parfait

Spring is coming... Spring is coming... Spring is coming!  Or at least it feels like it when you're eating one of these.  I had a couple of house guests over the weekend so I thought I'd make a little something special for breakfast.  Light and easy, but oh so tasty.


Granola
makes about 8 cups

6 cups rolled oats (not quick-cooking or instant)
2 cups mixed nuts and seeds
1 cup shredded coconut (optional)
1 teaspoon ground cinnamon, or to taste
dash of salt
1/2 to 1 cup honey or maple syrup, or to taste
1 cup raisins or chopped dried fruit

Heat the oven to 350 degrees.  In a bowl, combine the oats, nuts and seeds, the coconut if you're using it, cinnamon, salt and sweetener.  Spread evenly on a rimmed baking sheet and bake for 30 minutes or a little longer, stirring occasionally.  The mixture should brown evenly; the browner it gets without burning, the crunchier the granola will be.

Remove the pan from the oven and add the raisins.  Cool on a rack, stirring once in a while until the granola reaches room temperature.  Transfer to a sealed container and store in the refrigerator; it will keep indefinitely.

Taylor's Notes:
This is another one of those recipes that you can add just about anything you want.  For the nuts, I used about equal amounts of almonds, hazelnuts,walnuts and pecans.  It's just what I had in the house.  I chopped them all roughly in my food processor before adding them to the oat mixture.  


I used light maple syrup as the sweetener and used about a cup.  I didn't end up using any dried fruit because I was using fresh fruit in the parfaits, but I'll probably add Craisens or dried apricots next time I make it and then eat it as a snack or with vanilla yogurt.


I added a few more spices: ground cloves and nutmeg, about a 1/2 teaspoon each and also a teaspoon of vanilla.


For the parfaits, I just layered the granola with strawberry yogurt and fresh blackberries and blueberries in a glass.  It was a fun presentation and a nice little treat for my guests, if I do say so myself. :)


Enjoy!