October 29, 2010

... Pepita Granola

Have I mentioned my love for granola?  I've bought it more often than I've made it, but when I made it here and it was really tasty... and easy... and probably so much better for me than the store-bought stuff. 


When I came across this recipe on one of my go-to blogs, I couldn't wait to make it.  It seemed so Fall-ish with its pumpkin seeds, nuts and spices... it was just what I was looking for.


And when it's paired with pumpkin butter and plain yogurt, it's perfection on a crisp Fall morning.


Pepita Granola


3 cups old-fashioned rolled oats
1 cup sweetened flaked coconut
1/4 cup vegetable oil
1/2 cup sliced almonds
1/2 cup chopped walnuts
1/3 cup green (hulled) pumpkin seeds, sometimes called pepitas (not roasted)
1/3 cup packed dark brown sugar
1/4 cup mild honey
pinch cinnamon
pinch salt

1 cup tart dried cherries
1/2 cup dried blueberries
1/2 cup dried pears (1/4 inch dice)
1/2 cup diced dried apricots (1/4 inch dice)
1/3 cup golden raisins

OR

2 3/4 cup mixed dried fruit of your choice

Accompaniment: plain yogurt flavored with vanilla extract, pumpkin butter, or apple butter.

Put oven rack in middle position and preheat oven to 375 degrees.  Stir together all ingredients except the fruit in a large bowl until combined.  Spread mixture evenly on a large (17x12) shallow baking pan lined with parchment paper and bake, stirring occasionally, until golden brown, 30 to 35 minutes, but checking every five minutes after the 15-minute mark because it burns quickly.  Transfer granola, in pan, to rack to cool stirring occasionally, about 45 minutes.

Stir in dried fruit.

Granola keeps frozen (the fruit's moisture softens granola if not kept frozen) in an airtight container, for a few months.

Taylor's Notes:


Ok, she's really not kidding about how quickly granola can burn.  I baked mine just like she said, for 15 minutes, stir, and then check every 5 minutes.  I took it out after 20 minutes... total.  And when I do it over again, I'll probably take it out at 17 1/2 minutes.  It burns quickest at the edges, so be sure to pay close attention to those areas when stirring.


As far as fruit, I used 1 cup of dried figs, halved, 1 cup of dried sweetened blueberries, and 3/4 cup of dried tart cherries.  I'm still on the hunt for dried pears... yum.


Enjoy!

October 24, 2010

... Pumpkin Butter

Who else is glad the 'Great Pumpkin Shortage of 2009' is a thing of the past?  This girl is, that's who.  And when I found this recipe I knew it for sure.


I don't know what flavor screams "fall!" more than pumpkin.  Add to that brown sugar, and spices like cinnamon, nutmeg, and cloves and you have the makings for one sweet treat.


And why not share the love?  Pack that pumpkin in some cute little jars to give to friends and you'll soon realize you just might need to make another batch... for yourself!


Pumpkin Butter


1 (29 ounce) can pumpkin puree
3/4 cup apple juice
2 teaspoons ground ginger
1/2 teaspoon ground cloves
1 1/3 cups brown sugar
1 tablespoon ground cinnamon
1/2 teaspoon ground nutmeg

Juice of half a lemon (or 3 tablespoons lemon juice)

Combine pumpkin, apple juice, spices, and sugar in a large saucepan; stir well.  Bring mixture to a boil.  Reduce heat, and simmer for 30 minutes or until thickened.  Stir frequently.  Adjust spices to taste.  Stir in lemon juice, or more to taste.

Once cool, pumpkin butter can be kept in an airtight container in the refrigerator.

To preserve: Spoon hot pumpkin mixture into hot jars, filling to within 1/4 inch from top.  Remove air bubbles; wipe jar rims.  Cover at once with metal lids, and screw on bands.  Process in a boiling water bath for 10 minutes.

Taylor's Notes:
After I realized just how quickly I was going through that 'cute little jar' I decided to make another batch.  I'm not quite sure how, but the two batches were totally different.  The first was runny and took forever to thicken up (splattering and making a huge mess in the process) and the second was perfectly thick from the get go.  What I know to be true is that I definitely forgot the lemon juice in the second batch and I may or may not have only added a teaspoon of cinnamon to the first batch.  Don't ask me how... I must have been overcome with the amazing aroma that I wasn't concentrating on the recipe.  But, what I also know to be true is that both the batches taste really great.


I wasn't quite sure how preserving would work, so I called Grandma and got some great advice, as usual.  Follow the recipe to preserve as written above, but instead of processing the jars in a water bath, flip the jars over and let them sit until the metal lid has popped.  If you push down on the lid and it pops back, flip those jars back over and let them sit a while longer.  Just to be safe, I'd recommend keeping the pumpkin butter in the refrigerator, but to be honest it probably won't be around long enough for it to go bad. 


I was able to fill four 8-ounce jars with one batch of the mixture... which made for six lucky friends and just enough left for me.


Enjoy!


October 4, 2010

...Shrimp and Corn Chowder

It's Fall and you know what that means... soup, chowder, and chili... oh my!  Fall is absolutely my favorite season and I'm pretty sure part of that has to do with the comfort food.  So warm and cozy, how could you not love it?


This chowder was really easy to make and had great flavor with all the veggies and, ahem, bacon drippings (see below).


Serve it up with hot crusty roasted garlic bread and Fall will quickly become your favorite season, too.


Especially if you follow it up with Apple Crisp for dessert... thanks Mom!


serves 4 (in reality, more like 6)

2 tablespoons unsalted butter
2 leeks (white and light green parts), chopped
1 fennel bulb, chopped
kosher salt and black pepper
2 tablespoons all-purpose flour
1 8-ounce bottle clam juice
3 cups whole milk
1 pound potatoes, peeled and cut into 1/2-inch pieces
3/4 pound cooked peeled and deveined medium shrimp
1 10-ounce package frozen corn
2 tablespoons chopped fresh flat-leaf parsley
2 tablespoons fresh lemon juice

Heat the butter in a large saucepan over medium heat.  Add the leeks and fennel, season with 1/2 teaspoon salt and 1/4 teaspoon pepper, and cook, stirring occasionally, until the vegetables are tender, 4 to 5 minutes, stir in the flour.

Add the clam juice, milk, and potatoes and bring to a boil.  Reduce heat and simmer, stirring occasionally, for 12 minutes.  Stir in the shrimp and corn and cook until the potatoes are tender and the shrimp and corn are heated through, 3 to 5 minutes.  Stir in the parsley and lemon juice.  

Tip: Top it with crumbled bacon.  Cook 6 slices in a large saucepan until crisp.  Transfer the bacon to a paper towel-lined plate and use the pan drippings instead of the butter to cook the leeks and fennel.

Taylor's Notes:
This is the first time I've ever cooked with leeks or fennel.  Leeks... easy!  Fennel... what the heck do I do with this thing?!  I treated it like an onion and just chopped it up.  Not sure if that's exactly right, but it worked, and look at me trying something new!

I took the tip of sauteing the veggies in the bacon drippings and, although I haven't had the recipe the other way, I'd definitely recommend the bacon.  Everything is better with bacon, amiright?

It was a really easy and tasty recipe and perfect for a cool, fall evening.  

Enjoy!

October 3, 2010

...Pumpkin Cupcakes with Cream Cheese Frosting

A fall barbeque on a gorgeous day calls for a fall treat and these Pumpkin Cupcakes were just the thing!


Made in a mini cupcake version, they're the perfect bite-size treat... whether you have one or three!


The cardinal rule of baking things for other people is that you must taste them first... always.  Even if that means you have to have it for dinner... always.  I tell you what, it's a tough job, but someone's gotta do it.


Pumpkin Cupcakes with Cream Cheese Frosting
makes 24 cupcakes

1 18.5-ounce box yellow cake mix (plus ingredients called for in the package directions)
1/2 teaspoon pumpkin pie spice
1 15-ounce can pumpkin puree
2 8-ounce bars cream cheese, at room temperature
2 cups powdered sugar
24 pieces candy corn

Heat over to 350 degrees.  Line two 12-cup muffin tins with paper liners.  Prepare the cake mix as directed but with the following change: Add the pumpkin pie spice and substitute the can of pumpkin puree for the water called for in the package directions.

Divide the batter among the prepared muffin tins and bake until a toothpick inserted into the center of a cupcake comes out clean, 18 to 22 minutes.  Let cool.

Meanwhile, using an electric mixer, beat the cream cheese and sugar until creamy.  Spread on the cupcakes and top each with a piece of candy corn.

Taylor's Notes:
I used Duncan Hines yellow cake mix and followed the directions on the box for the lower fat version, but added the pumpkin puree and pumpkin pie spice as directed above.  I also added a 1/4 teaspoon of vanilla extract to the batter. 


I set out to make mini cupcakes and baked them for 18 minutes.  I had a bit of leftover batter so made regular size cupcakes as well and ended up baking them for a minute or so longer.  It'll likely vary per your oven, but use the toothpick and you'll have success every time!


For the cream cheese frosting, I used 1/3 less fat cream cheese with the 2 cups of powdered sugar.  I added 1/4 teaspoon of vanilla extract to the frosting, too, and about the same of nutmeg.  I think I'll add a little more next time... it adds to the autumn spicy-ness of the cupcake.


I didn't add the candy corn on top this time, but I did last year as a Halloween treat and they were really cute!


Enjoy!

September 19, 2010

...Chicken Stuffed with Spinach, Feta, and Pine Nuts

Family Dinner... September 2010.  Nearly a year after I start the blog and I have a full house for dinner.  So much fun... tight quarters, but fun!  I decided to try a new recipe, which is usually a risk for company, but what better guinea pigs than family, right? 


A bit of a Mediterranean spin on standard baked chicken: spinach, pine nuts, feta and garlic... all stuffed into a pocket (this time on the side of the chicken rather than the top...lesson learned).


And while the chicken bakes: wine... we never forget wine...


Great flavors, but it was missing just a little something... a sauce... more seasoning... not sure.  I'll have to work on this one a bit.  The currant couscous was a great side, though!  All in all, a good choice for a fun, family dinner.


Chicken Stuffed with Spinach, Feta, and Pine Nuts
serves 4

5 ounces fresh spinach, chopped
1/2 cup (2 ounces) crumbled feta cheese
2 tablespoons pine nuts, toasted
1 teaspoon fresh thyme, minced
2 teaspoons fresh lemon juice
2 garlic cloves, minced
4 (6 ounce) skinless, boneless chicken breast halves
1/4 teaspoon salt
1/4 teaspoon freshly ground black pepper
1 tablespoon olive oil
1/2 cup fat-free, lower-sodium chicken broth

Preheat oven to 350 degrees.

Heat a large nonstick oven-proof skillet over medium-high heat.  Add spinach to pan; cook 1 minute or until spinach wilts, tossing constantly.  Place spinach in colander; press until barley moist.  Wipe pan clean.

Combine spinach, cheese, nuts, thyme, juice, and garlic.  Cut a horizontal slit through the thickest portion of each chicken breast half to form a pocket.  Stuff 3 tablespoons filling into each pocket.  Seal with wooden picks.  Sprinkle chicken with salt and pepper.

Heat oil in pan over medium-high heat.  Add chicken; cook 3 minutes on each side or until brown.  Add broth, and cover pan.  Place pan in oven.  Bake at 350 degrees for 15 minutes or until done.  

Taylor's Notes:

This was a really easy one, especially since I was sure to prep everything before I started cooking.  I knew I'd be distracted with all the company and was sure I'd forget something (which I still did) and wanted to be sure to be able to enjoy my family while I cooked (which I still did).  I missed adding the lemon juice to the spinach / cheese / nut / garlic mixture.  Maybe that's what the end result was missing... I'm sure it would have brightened it a bit, not sure if it would have made all the difference.  

Since there were several of us, I baked the chicken in a 9x13 pan rather than in the skillet that I browned it in.  Other than being one more pan to clean (which Mom did... thanks Mom!), it worked out perfectly.  

I would definitely recommend this recipe... let me know what you think and if you decide to add a little something extra.

Enjoy!

September 12, 2010

...Blueberry Crumb Bars

I seem to be making quite a liar out of myself with this "I never make bars" talk.  Delicious recipes seem to be popping up everywhere I turn and I can't help but want to make them for myself.  When I saw these posted on one of my favorite blogs and realized that she had gotten the recipe from another one of my favorite blogs, I decided it was kismet and I must make them, too.  It starts out similar to these with a basic crumbly dough recipe.


Then you add plump, juicy, fresh blueberries... pop it in the oven and Voila!


It just so happened that I was planning to go to the K-State football game and that I'd promised to bring a dessert... and the fact that this dessert is purple and so are the Wildcats... well, again, kismet.


Blueberry Crumb Bars
makes 24 bars


1 1/2 cups white sugar, divided
1 teaspoon baking powder
3 cups all-purpose flour
1 cup cold unsalted butter
1 egg
1/4 teaspoon salt
zest and juice of one lemon
4 cups fresh blueberries
4 teaspoons cornstarch

Preheat the oven to 375 degrees.  Grease a 9x13-inch pan.

In a medium bowl, stir together 1 cup sugar, 3 cups flour, and baking powder.  Mix in salt and lemon zest.  Use a fork or pastry cutter to blend in the butter and egg.  Dough will be crumbly.  Pat half of dough into the prepared pan.

In another bowl, stir together the remaining 1/2 cup sugar, cornstarch, and lemon juice.  Gently mix in the blueberries.  Sprinkle the blueberry mixture evenly over the crust.  Crumble remaining dough over the berry layer.

Bake in a preheated oven for 45 minutes or until top is slightly brown.  Cool completely before cutting into squares.

Taylor's Notes:
Another easy recipe... and fun, too, because you can get your hands dirty by using your fingertips to blend the butter and egg into the flour mixture.  I used a fork to get it all started and then used my fingers to really get it all blended together.


I bet you could use frozen-then-thawed blueberries for this recipe when fresh aren't in season, but, as I'm sure you know, fresh always tastes better.  Deb from Smitten Kitchen says that she substitutes other fruit during the year - like cranberries in the fall - and uses orange zest and juice in place of the lemon.  Sounds delicious to me!


These didn't keep as well as I'd hoped.  The crumb topping got a little soft after a day or so, but they're still quite tasty and will be wonderful warmed up for breakfast!


Enjoy!

September 9, 2010

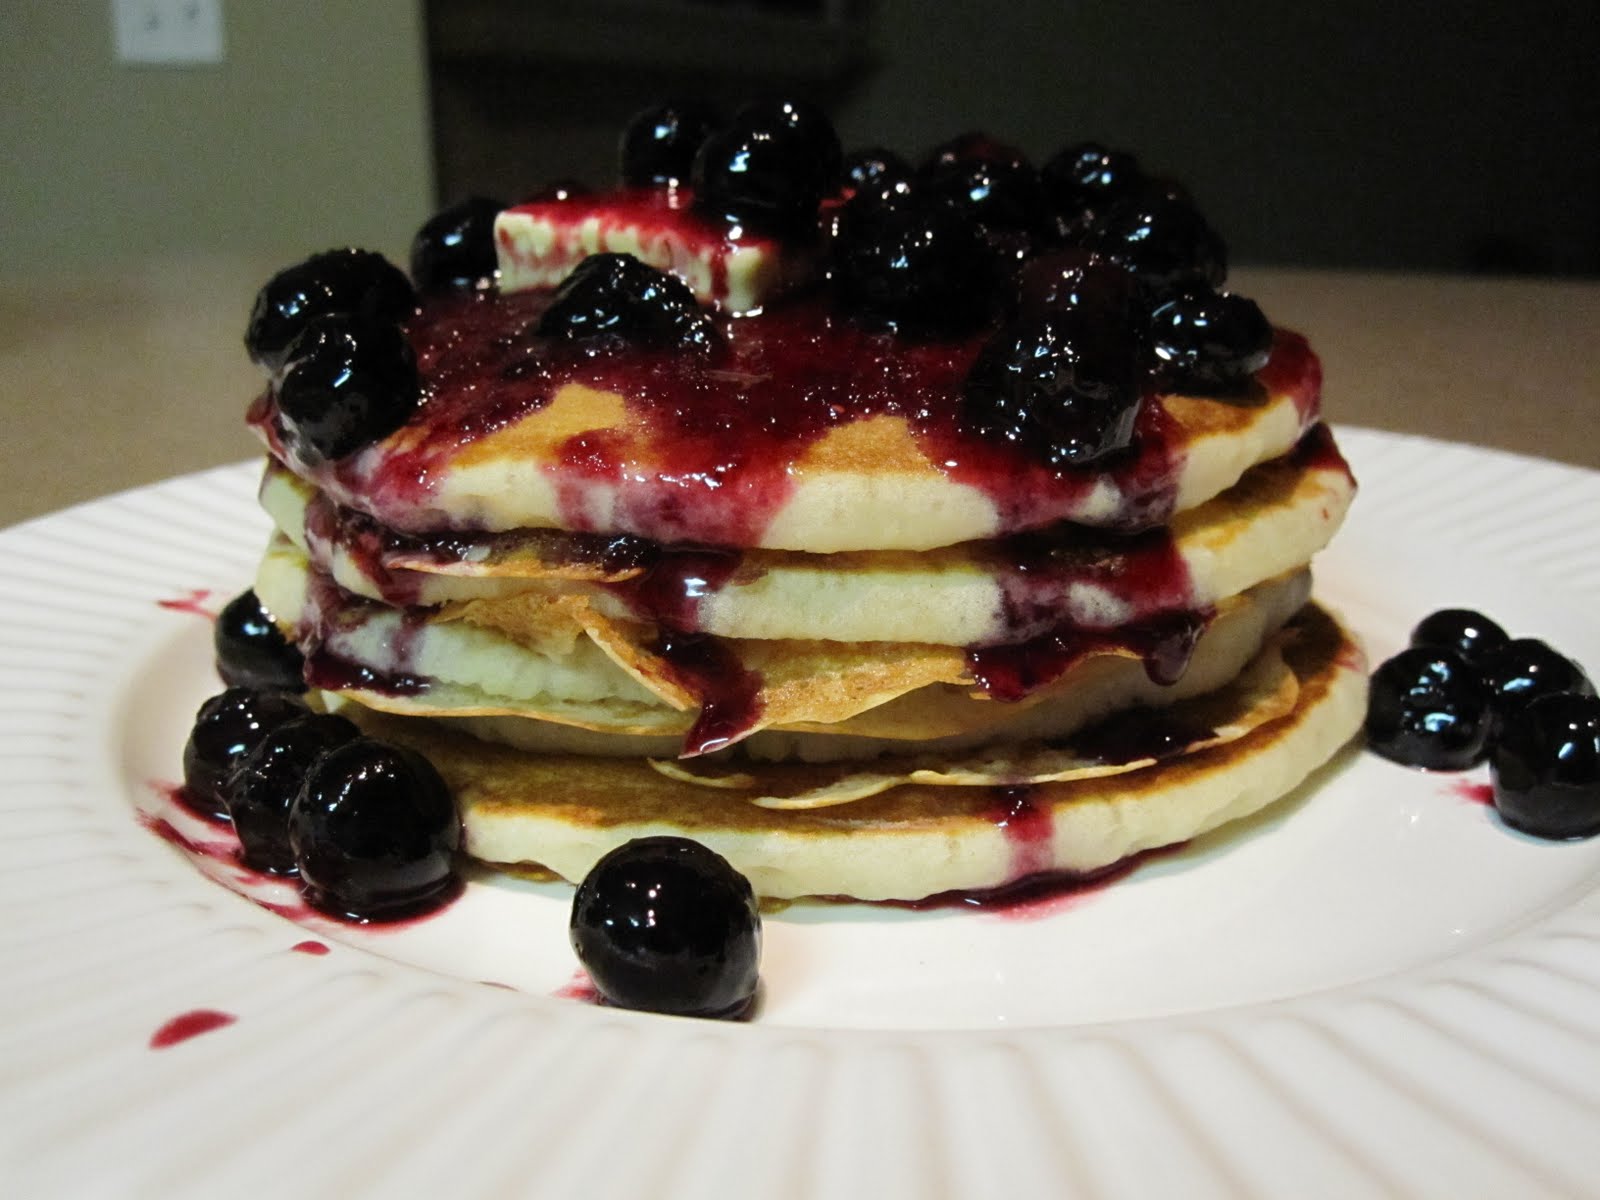
...Pancakes with Blueberry Sauce

Ok, whoever came up with the idea of breakfast for dinner is brilliant.  I mean, the kind of brilliant that deserves a medal.  Or a hug, a big, big hug.

Today was a dreary, drizzly, kind of cool, almost Fall kind of day... the perfect kind of day for comfort food.  And so it became clear, on my drive home, that I should make pancakes.  And I should make them with a wonderfully decadent blueberry sauce.  And so I did.


And it was the best decision I'd made all day.  Even the dogs agree!


Now, there's really not much to making pancakes and I would assume that most people have their favorite recipe.  So, I'm not going to tell you how I used Aunt Jemima mix, added and egg, some milk, and a little oil and had the best pancakes I've ever made.  But what I can do is give you a few tips and tricks to help you get great pancakes on your plate every time.  
  1. If you can get my dad to make them for you, do it.  He's the best pancake maker ever.  Seriously.
  2. If you can't, follow these simple rules...
    1. Make sure your pan is hot enough.  Heat it over medium to medium-high heat.  Not too hot or your pancakes will be crisp on the outside and gooey in the middle.  Yuck.  A good trick is to sprinkle water on the pan.  When the water bubbles up and sizzles away, your pan is hot enough.
    2. Don't crowd your pancakes.  Depending on the size of your pan, only pour the batter for two or three at a time.  
    3. Let them be!  Your batter will bubble up and you'll be able to see the edges start to form.  Only then should you flip them.  And when you do, they'll be a beautiful golden brown.


Now don't get me wrong, I love a good pancake with butter and syrup just like the next girl, but sometimes you just want a little something extra.  Take a look at this and tell me if that's not a little something extra...


1/2 cup sugar
3 tablespoons unsalted butter
2 cups berries or other ripe fruit - apples, pears, bananas, peaches, etc...

Combine 1/2 cup water with the sugar and butter in a heavy-bottomed medium saucepan over medium-high heat and cook, shaking and stirring, until the mixture is thick and syrupy but not browned.

Toss in the fruit and cook over low heat until the fruit begins to break up and release its juices, about 2 minutes for berries, longer for other fruit.  Press fruit through a fine-mesh strainer or run it through a food mill to puree and remove any skins or seeds.  Serve warm or at room temperature.  This sauce keeps well, refrigerated, for up to a week.

Taylor's Notes:

I had no doubt that I'd find the recipe I needed in my How to Cook Everything cookbook.  That book should seriously be in everyone's cookbook collection.

I followed the recipe exactly (with the exception of halving it) and it came out perfectly.  Oh, I also didn't press the fruit through a strainer or puree it as I wanted some whole fruit on my pancakes.  But other than that, I followed the other steps to a tee.  

Getting the butter / sugar / water mixture to thicken took about 5 minutes after the butter melted.  As you can see in the pictures above, it'll all melt, then foam, and then thicken.  I added the blueberries and tossed them around for about two minutes and then took the pan off the heat and let it set until my pancakes were done.  

It was easy and then end result had me wishing I hadn't fed the rest of the pancakes to the dogs. 

Enjoy!