Have you ever met a person who doesn't love Girl Scout cookies? I haven't! What is it about them that makes you stock your freezer with all your favorites? My all-time fave is Thin Mints. Hands down. No questions asked. I love them so much that I didn't order even one box this year because I can't be trusted alone with them. Seriously. Not.one.box.
So, it should come as no surprise that when I found a recipe (thankyouverymuch emily) to make my own, I couldn't resist. Can you blame me?
I know what you're thinking... 'Ok, Taylor, but are they just as good as the real thing?' No, no they're not. What? Were you expecting they would be? Come on now. But are they good enough, even great enough, to do the trick in a what-on-earth-was-I-thinking-not-ordering-any craving? Absolutely.
makes 3 1/2 to 4 dozen cookies
2 1/4 cups all purpose flour
1/4 cup cornstarch
6 tablespoons unsweetened cocoa powder
1/2 teaspoon salt
1 cup white sugar
1/2 cup butter, room temperature
1/3 cup milk (any kind)
1/2 teaspoon vanilla extract
3/4 teaspoon peppermint extract
In a small bowl, whisk together flour, cornstarch, cocoa powder and salt.
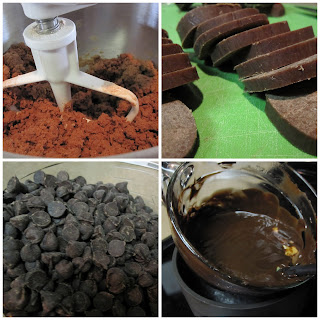
In a large bowl, cream together butter and sugar. With the mixer on low speed, add in the milk and the extracts. Mixture will look curdled. Gradually, add in the flour mixture until fully incorporated.
Shape dough into two logs, about 1 1/2 inches in diameter, wrap in plastic wrap and freeze for at least 1-2 hours, until dough is very firm.
Preheat oven to 375 degrees.
Slice dough into rounds not more than 1/4 inch thick - if they are too thick they will not be as crisp - and place on a parchment lined baking sheet. Cookies will not spread very much so you can put them close together.
Bake for 13-15 minutes, until cookies are firm at the edges. Cool cookies completely on a wire rack before dipping in chocolate.
Dark Chocolate Coating
10-ounces dark or semisweet chocolate
1/2 cup butter, room temperature
In a microwave-safe bowl, combine chocolate and butter. Melt on high power in the microwave, stirring every 45-60 seconds, until chocolate is smooth. Chocolate should have a consistency somewhere between chocolate syrup and fudge for a thin coating.
Dip each cookie in melted chocolate, turn with a fork to coat, then transfer to a piece of parchment paper or wax paper to set up for at least 30 minutes, or until chocolate is cool and firm.
Reheat chocolate as needed to keep it smooth and easy to dip into.
Taylor's Notes:
Although a little time consuming with having to freeze the dough for a couple hours and then dip each of the 48 plus or minus cookies, these are definitely a little gem I'll keep in my back pocket for special
Try to make the slices less than 1/4-inch thick if you can. It's easier if the dough is really cold. The end result of the cookie is much better if they're thinner.
When it comes to making the chocolate coating, I would recommend melting the chocolate on the stove with a double-boiler rather than in the microwave. This way, you won't run the risk of burning the chocolate and you won't have to keep re-heating it. Put a little water into a small saucepan and bring it to a simmer. Put your chocolate and butter into a glass bowl that will sit in the saucepan without touching the simmering water. Stir your chocolate occasionally until it's melted to a dip-able consistency. (Per the original recipe, that's somewhere between fudge and syrup... ummmm, I don't know about you, but that's a pretty big difference.) I put a cookie on a fork and dipped it in the melted chocolate, then gently shook the fork so the excess chocolate comes off.
The next part is very hard and if you're anything like me, you'll find yourself pacing the kitchen and hovering over the cookies waiting for the chocolate to harden so you can eat one... or four.
Enjoy!


No comments:
Post a Comment